
How checklists, consistent photos, and guided reports can support a better-prepared consultation
Why preparation matters
A dermatology appointment is a short conversation about a concern that may have developed over days or weeks. A patient might say, “The redness was worse last week,” or “I think it began after I changed cleansers.” They may also bring a camera roll full of photos taken in different rooms, lighting, and angles.
The clinician must reconstruct the timeline while examining the skin, reviewing the patient’s history, and discussing next steps. Clear notes and consistent, dated images can make the opening conversation more focused.
Patient-submitted photos can be helpful, but their quality and usefulness vary. In a 2022 survey study, dermatologists judged submitted images useful for medical decision-making 55.1% of the time and of sufficient quality 62.2% of the time. Read the JAMA Dermatology study. The findings highlight the importance of image quality and context; they do not show that any particular scanning tool improves care.
What patients should organize before the visit
Clinics can send a short checklist with appointment reminders. Patients do not need to identify or diagnose a condition themselves; the goal is to describe what they have noticed.
- Visible changes: Note the location, color, texture, and approximate size. Describe whether the change affects one side or both, and whether it is itchy, painful, or burning.
- Timeline: Record when the change was first noticed, whether it appeared suddenly or gradually, and whether it is improving, worsening, staying the same, or coming and going.
- Products and treatments: List cleansers, moisturizers, sunscreen, makeup, prescribed treatments, and over-the-counter products. Include approximate start and stop dates when possible.
- Medications and supplements: Include prescription and nonprescription medicines, vitamins, and supplements.
- Questions and records: Write down questions before the appointment and bring relevant previous test results or treatment information, if available.
The American Academy of Dermatology also recommends preparing questions, listing medications and supplements, and bringing relevant medical records. See the AAD’s appointment-preparation guidance.
Taking photos that are easier to compare
Photos can look different because of lighting, camera distance, angle, filters, or makeup. A consistent routine makes images easier to review, although it cannot remove every source of variation.
- Use bright, even light that falls on the skin rather than coming from behind.
- Turn off filters and beauty effects, and avoid makeup on the area being documented when practical.
- Keep camera distance and angle as similar as possible.
- Use a neutral background and take a general view plus closer views where appropriate.
- Record the date and briefly note anything that may affect appearance, such as a new product or a flare-up.
These recommendations align with the American Academy of Dermatology’s photo-taking guidance and published recommendations on standardized clinical skin imaging. Read the JAMA Dermatology technical guidelines. Patients should ask their clinic how to send images securely. Photos are supporting information, not a substitute for an examination when one is needed.
Where FaceEcho may fit
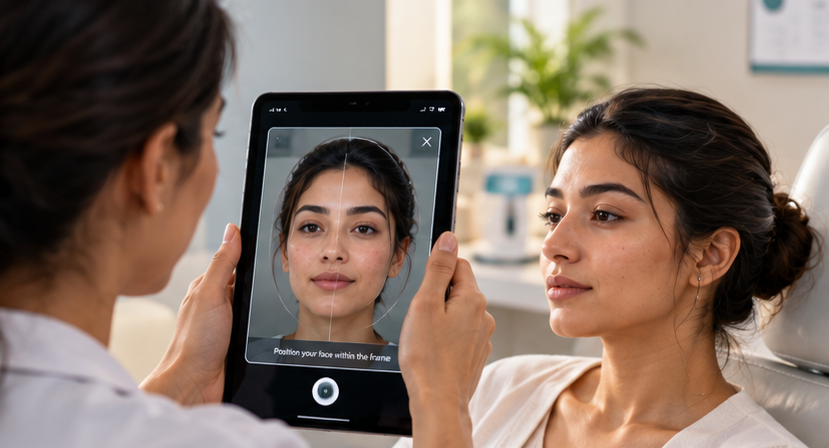
FaceEcho offers guided facial scans and downloadable reports. Patients can follow on-screen capture guidance, answer relevant questions about symptoms and timing, and save the resulting report as a PDF. This brings visible observations and the patient’s own account together in one place. Learn more about how FaceEcho works or explore the FaceEcho Health experience.
For example, a patient notices cheek redness and recalls that it began several weeks after starting a new exfoliating serum. Before the appointment, they record guided facial views, note when the redness began, and bring a list of products they use. The dermatologist can review that context, examine the skin, and decide what it means.
A repeat observation before a follow-up visit may provide another dated record. Differences between images do not prove that the skin has changed medically or that a product caused the change. Lighting, positioning, makeup, and other factors can affect appearance.
A practical clinic workflow
- At booking: Send a short preparation checklist and explain what information patients should bring.
- Before the appointment: Invite patients to organize their timeline, products, medications, questions, and—if they wish—consistent photos or a guided report.
- At the appointment: Review the patient’s account alongside the medical history and physical examination. Verify dates and details rather than treating them as confirmed facts.
- At follow-up: Compare dated records when useful, while considering differences in lighting, positioning, and other factors.
Patients currently download their FaceEcho report and choose whether to share it through a channel accepted by their clinic. Automated transfer into provider systems and appointment-workflow integrations should not be assumed to be available. Clinics should decide who reviews incoming reports, how they are stored, and which secure sharing method patients should use.
Potential benefits—and what still needs testing
A structured preparation process could help patients explain their concerns more clearly, reduce reliance on memory, and give clinicians a dated record to discuss. Guided capture may also encourage more consistent images than unstructured selfies.
These are potential workflow benefits, not established outcomes for FaceEcho. Clinics should evaluate the approach in their own setting rather than assume that it saves time or improves clinical decisions.
A small pilot could track:
- How many invited patients complete the checklist or optional scan.
- How often staff need to follow up for missing dates or product details.
- How much time staff spend collecting and reviewing information.
- Whether clinicians find the report relevant and easy to use.
- Whether patients find the process helpful, neutral, or uncomfortable.
Limitations, safety, and privacy
- Not a diagnostic tool: FaceEcho does not diagnose, confirm, or rule out a medical condition. A report with no notable observation does not mean the skin is healthy.
- Facial observations only: A facial report does not cover moles, rashes, or lesions elsewhere on the body and cannot replace a full skin examination.
- Images have limits: Skin tone, camera quality, lighting, angle, and makeup can influence how features appear. A difference between images is not proof of a medical change or its cause.
- Patient details need checking: Timelines and product histories rely partly on memory and should be verified during the consultation.
- Privacy matters: Reports may contain facial images and personal health information. Clinics should define how reports are shared, who can access them, and how they are stored.
- Do not delay urgent care: Patients should promptly tell their clinic about concerning or changing symptoms and follow clinical advice rather than waiting to complete a scan or report.
Recommendations for clinics
- Start with a basic pre-visit checklist; it is useful even when patients do not use a scan.
- Offer guided facial observations as optional, and explain clearly what the report can and cannot show.
- Use a defined, secure method for sharing reports and decide who is responsible for reviewing them.
- Pilot the workflow with a small group and gather feedback from patients and staff.
- Keep diagnosis, treatment decisions, and clinical interpretation with the dermatologist.
Frequently asked questions
1. How should I prepare for a dermatology appointment?
Write down when the concern began and how it has changed. Bring a list of skincare products, medications, and supplements, along with relevant records and the questions you want to ask. You do not need to diagnose the problem yourself.
2. How can I take skin photos that are easier to compare?
Use bright, even lighting, a neutral background, and a similar camera distance and angle each time. Turn off filters, make sure the image is in focus, and note the date. Ask your clinic how it wants photos shared securely.
3. What role does FaceEcho play in appointment preparation?
FaceEcho can organize guided facial views and patient-provided context, such as symptoms and timing, into a downloadable PDF report. It is intended to support preparation and discussion, not diagnose a condition or replace a dermatologist’s examination.
4. How do I share a FaceEcho report with my dermatologist?
Download the PDF and ask the clinic which secure method it accepts. Patients choose whether to share the report; it is not automatically sent to a provider’s system. Clinics should confirm who will review it and how it will be stored.
Conclusion
The goal is not for patients to arrive with their own diagnosis. It is for them to arrive with better information: a clear timeline, a product and medication list, relevant observations, and questions they want answered. A simple checklist can help every patient, while an optional guided report may offer another way to organize facial observations. Used carefully, these tools can support the conversation—but the dermatologist’s examination and clinical judgment remain central.